Exercise 35 : Passive Voice
1. The President is being called by somebody everyday
2. The other members are being called by John
3. Mr. Watson would be called by somebody tonight
4. Considerable damage has been caused by the fire
5. The supplies for this class should have been bought by the teacher
Exercise 36 : Causative Verbs
1. Left
2. Repaired
3. Typed
4. Called
5. Painted
6. Wrote
7. Lied
8. Sent
9. Cut
10. Signed
11. Left
12. Washed
13. Fixed
14. Published
15. Found
Overclock CPU adalah proses meningkatkan kecepatan clock (clock: tingkatan/kecepatan prosesor dalam pengolahan data) CPU. Overclock dapat meningkatkan kinerja komputer secara signifikan, namun juga bisa berisiko merusak perangkat keras jika dilakukan secara keliru
Beberapa hal yang harus diperhatikan :
Usahakan sistem pendinginan dan ventilasi komputer anda baik
Jika ingin mengoverclock sistem, disarankan anda menaikkan kecepatannya sedikit demi sedikit
Jangan lupa untuk melakukan tes stabilitas (Dengan menbenchmark, lalu dilihat apakah komputer anda hang terus)komputer anda.
Sangat dianjurkan jika anda menggunakan thermal paste yang bagus dan belum pernah dipisahkan dengan komponennya.
Lihatlah temperatur anda. Jangan melebihi angka 70 an saat sistem agak sibuk.
Lebih baik jika sistem smart fan dimatikan.
Bersihkan fan processor jika aliran udara sudah tersumbat. Ini akan menciptakan perbedaan yang signifikan.
Siap-siap jika sesuatu ada yang salah, ketahuilah dimana tempat baterai bios dan jumper reset bios.
step by step overcloking processor
Masuklah setup bios
Biasanya dengan menekan del. Anda dapat membaca tombol apa yang harus ditekan saat bios boot screen muncul.
Masuklah ke dalam settings Mother Board Intellident Tweaker atau sejenisnya,Menu Mother Board Intellident Tweaker
Hidupkan kontrol frekuensi manual
Rubahlah frekuensi CPU ke angka yang lebih tinggi
Misal, saya merubah dari 133 menjadi 140. Angka ini akan dikalikan dengan multiplier, menjadi kecepatan prosessor anda.
Prosessor intel pada umumnya tidak dapat dirubah multipliernya.
Lalu save settings.
Dan anda telah mengoverclock prosesor anda.
Jika anda ingin mengoverclock ram, bukalah settings DRAM Clock. Dan pilihlah kecepatan yang lebih tinggi.
-Ingat untuk memonitor perubahan temperatur prosesor anda.
catatan :
Jika anda mengoverclock Processor, maka secara otomatis ram juga di overclock, jika anda hanya mengoverclock processor, maka jangan lupa untuk merubah kecepatan ram. Ingat saja, kecepatan ram berbentuk linear.
Untuk mencari informasi tentang processor anda, gunakan program CPU-Z
Exercise 28 : Comparisons (Page 114)
1. As soon
2. More important
3. As well
4. More expensive
5. As hot
6. More talented
7. More colorful
8. Happier
9. Worse
10. Faster
Exercise 29 : Comparisons (Page 114)
1. Than
2. Than
3. From
4. Than
5. As
6. Than
7. As
8. Than
9. Than
10. From
Exercise 30 : Comparisons (Page 117 – 118)
1. Best
2. Happiest
3. Faster
4. Creamiest
5. More colorful
6. Better
7. Good
8. More Awkwardly
9. Least
10. Prettiest
11. The best
12. From
13. Less impressive
14. The sicker
15. When
16. Twice as much as
17. Little
18. Much
19. farther
20. More Famous
Exercise 31 : Nouns Functioning as Adjectives (Page 119)
1. Twelve-story
2. Language
3. Three-act
4. Two-day
5. 79-piece
6. Five-shelve
7. 16-ounce each
8. Six-quart
9. Brick
10. Ten-speed
Exercise 32 : Enough (Page 120)
1. Enough people
2. Enough French
3. Enough Time
4. Fast enough
5. Soon enough
6. Early enough
7. Hard enough
8. Slowly enough
9. Enough flour
10. Enough books
Exercise 33 : Because / Because Of (Page 121)
1. Because
2. Because
3. Because of
4. Because
5. Because
6. Because of
7. Because of
8. Because
9. Because
10. Because of
Exercise 34 : So / Such (Page 124)
1. So
2. Such
3. Such
4. Such
5. So
6. So
7. Such
8. So
9. Such
10. Such
11. So
12. So
13. Such
14. So
15. So
Sebelum melakukan riset Ulang sebaiknya data harus di backup karena Factory reset atau reset ulang pada android akan menyebabkan semua data dan aplikasi yang tersimpan di memori internal handphone/tablet android akan terhapus.Banyak cara yang bisa dilakukan untuk mereset ulang android, baik itu dengan melalui menu Backup & Reset, menekan kode rahasia,atau melalui Recovery Mode pada Android.
Melalui Menu Setting/Pengaturan di Android
Cara ini bisa dicoba jika kamu masih bisa mengakses menu Setting atau Pengaturan pada android, sebelum melakukan reset sebaiknya backup terlebih dahulu data yang dianggap penting seperti foto-foto, video, dokumen dan file-file penting lainnya ke External Memori.
Untuk mengembalikan ke pengaturan pabrik langkah-langkahnya adalah sebagai berikut :
Masuk ke menu Setting/Pengaturan
Scroll kebawah kemudian cari menu Backup & Reset
Kemudian tap Factory data reset
Centang yang dianggap benar,kemudian tap reset device.
Tunggu proses resetnya hingga selesai sekitar 3-10 menit tergantung banyaknya data yang ada pada hp atau tablet.
Setelah selesai maka android akan restart sendiri, jika tidak silahkan lakukan secara manual.
Cara kedua yang bisa ditempuh adalah menggunakan tombol rahasia yaitu *2767*3855# . Dengan catatan anda masih bisa mengakses keyboard.
Baca juga : Cara mengembalikan file terhapus di android
Factory Reset dengan Recovery Mode
Langkah terakhir ini adalah cara yang paling ampuh untuk mereset ulang android, cara ini biasanya dilakukan jika kita tidak bisa mengakses hp/tablet seperti Bootloop.
Berikut ini cara masuk ke Recovery Mode untuk melalukan Wipe Data/Factory Reset pada Android :
Pertama-tama pastikan baterai anda cukup, minimal 70% untuk menghindari hal yang tidak diinginkan.
Lalu matikan handphone atau tablet android anda.
Tekan dan Tahan tombol Volume Up + HOME + Power secara bersamaan beberapa detik.
Gunakan Volume Up untuk memilih menu “Factory reset / wipe data”.
Kemudian tekan tombol Home untuk memulai proses reset.
Tunggu beberapa saat sampai prosesnya selesai.
Kemudian pilih lagi menu Reboot System Now.
Untuk masuk ke menu Recovery Mode hanya bisa dilakukan saat kondisi hp mati (off)
Untuk masuk ke Recovery Mode di setiap handphone kadang berbeda-beda tergantung merk/tipe hp yang digunakan,berikut ini adalah cara masuk recovery mode di semua merk handphone android.
Cara Masuk Recovery Mode Semua Merk Hp
ACER
Acer BeTouch E210 dan Acer Liquid Metal:
Tekan Tombol Volume Down + Camera + Power Secara bersamaan > Ikuti petunjuk yang ada di layar
ADVAN
Advan T1c:
Tekan tombol POWER, setelah mulai start-up, tekan tombol Volume Down hingga keluar gambar Android dan Segitiga + tanda seru /!\. Setelah itu tekan tombol HOME untuk masuk ke recovery mode. Bila tombol HOME tidak berfungsi, coba tekan tombol MENU.
CROSS
Cross A1 Tabmate:
Tekan dan tahan tombol Vol Down lalu tekan tombol POWER (keduanya jangan dilepas sampai masuk recovery mode)
Cross AD350:
Tekan tombol HOME + Volume Down + Tekan tombol Power > akan muncul tanda /!\ > tekan tombol HOME
Cross A6T TabMate:
Tekan Tombol Home + Volume Up + Tombol Power
CSL
Blueberry CSL Mi 410:
Tekan dan tahan tombol Volume Up + Volume Down + Power secara bersamaan > setelah itu tekan tombol HOME
Blueberry CSL Mi 320:
Tekan Trackpad + tombol Volume Up + Power bersamaan
HUAWEI
Huawei X3 dan X5:
Tekan dan tahan tombol vol up + tombol Power
Huawei S7:
Tekan tombol MENU + Call + Power
Ideos C8150 (AHA Touch):
Tekan tombol Call + Volume Up + Tombol Power
IMO
IMO Tab Z5:
Takan Tombol Power + Volume Down secara bersamaan > saat ada tampilan IMO, lepas tombol Power (Tombol Volume tetap ditahan).
IVIO
IVIO DE88:
Tekan dan tahan Tombol Camera + Tombol HOME > tunggu hingga muncul logo Android, langsung tekan tombol MENU+BACK bersamaan. Navigasi menggunakan tombol Volume, untuk memilh atau OK gunakan tombol Camera.
LG
LG L3 E400:
Tekan Tombol Tengah + Volume Atas + Tombol Power > tunggu sampai muncul logo LG , lepas tombol power.
Cara Hard Reset LG L3 E400:
Tekan Tombol Tengah + Volume Bawah + Tombol Power, setelah bergetar dan keluar logo LG , lepas tombol power > tunggu beberapa saat.
SAMSUNG
Samsung Galaxy Mini, Galaxy Ace, Galaxy Gio dan Galaxy Fit:
Tekan tombol Home(tengah) + Power, tunggu sampai muncul logo Samsung.
Samsung Galaxy 551:
Tekan tombol huruf T + tombol Power. Untuk navigasi atas bawah dapat menggunakan tombol panah, sedangkan untuk melakukan pilihan menggunakan tombol Shift.
Samsung Galaxy Pro:
Tekan tombol T + Tombol Power.
Samsung Galaxy Y (Young) GSM:Tekan tombol Vol Up + tombol HOME + tombol Power secara bersamaan selama beberapa detik.
Samsung Galaxy Y (Young) CDMA:Matikan HP > Tekan tombol Power, saat muncul logo Samsung > tekan tombol VOL UP sampai masuk ke recovery Mode. Kalau handphone menyala normal masuk ke menu seperti biasa, matikan handphone lagi dan ulangi proses dari awal.
Samsung Galaxy W (Wonder):Tekan tombol Volume Up + Tombol HOME (tombol tengah) + Tombol Power secara bersamaan > tunggu sampai keluar logo Samsung, lalu tekan tombol MENU (tombol sebelah kiri dari tombol HOME).
Samsung Galaxy Tab 7? (P1000) / Tab 7 Plus (P6200): Matikan Tablet lalu Tekan tombol Volume UP + Tombol Power secara bersamaan sampai layar menyala.
Samsung Galaxy Note N7000: Tekan tombol Volume UP+Home+Power > tunggu sampai muncul tulisan Galaxy Note, setelah itu lepas ketiga tombol tersebut.
PERINGATAN!: Bagi Anda yang menggunakan Galaxy Note dengan sistem operasi Ice Cream Sandwich Android 4.0.x, sebaiknya jangan melakukan factory reset karena ROM ini menurut beberapa pengguna memiliki bug yang dapat merusak HP.
Samsung Galaxy Mini II S6500: Tekan tombol Volume up+ Volume down + Tombol Home + Tombol Power secara bersamaan.
Samsung Galaxy Chat GT-B5330: Tekan tombol Volume Down + Home + Power.
Samsung Galaxy Ace Plus: Tekan tombol Vol UP + Vol Down + Tombol HOME bersamaan lalu selagi ketiga tombol tsb ditekan, tekan tombol POWER lalu langsung dilepas (jgn ditahan). Tunggu sampai masuk menu recovery baru lepas semua tombol.
SMARTFREN Andromax:
Tekan dan tahan tombol Power + Volume Down. Bila sukses masuk ke recovery mode, gunakan tombol Vol UP/Down untuk memilih menu. Utk melakukan pilihan, tekan tombol MENU yang terletak di sebelah tombol HOME atau tombol touch screen yg bergaris 4.
Tabulet Sparta:
Dalam keadaan perangkat terhubung dengan charger, tekan tombol Power + Volume Up + Vol Down.
TOM i20:
Tekan tombol Volume up + Power secara bersamaan
Semoga Bermanfaat ,Terima Kasih.
Sumber : https://helodroid.com/cara-reset-ulang-hp-android-terbaru/
Pastikan sobat telah mempunyai Master dari Software/Game yang ingin sobat install di PC sobat.
Perlu diketahui, bahwa AntiVirus sangatlah berpengaruh dalam proses penginstalan. Maka dari itu, silahkan sobat matikan terlebih dahulu AntiVirusSobat sebelum menginstal. ( Karena file berformat .exe mudah di deteksi sebagai Virus oleh AntiVirus sobat ).
Silahkan sobat buka file Setup.exe nya ( Jangan Autorun.exe ! karena beberapa game/software kebanyakan file Autorun.exe nya error ). Jika tidak ada, buka saja Autorun.exe tersebut.
Pilih destinasi penginstalan nya. Saya sarankan untuk memilih default saja ( System (C:) ) karena lebih lengkap, atau jika disk System (C:) sobat sudah penuh, maka pilih saja yang lainnya seperti: data (D:), etc…
Tunggu proses install sampai selesai.
Jangan menjalankan game/software tersebut dan jangan terburu-buru untuk merestart komputer sobat. Copy paste terlebih dahulu Crack dari game/software nya.
Biasanya, untuk software, selain meng Copy – Paste Crack, Sobat harus meng Registrasi terlebih dahulu untuk mendapatkan versi Full nya ( Lihat kode registrasi yang sudah dicantumkan di cover/di dalam notepad Readme nya. Jika tidak ada, silahkan gunakan Keygen ). Untuk Game, saya rasa tidak memakai Registrasi,cukup hanya Copy – paste Crack saja.
Yang terakhir, silahkan sobat Restart komputer sobat.
cara menginstal driver windows7 secara manual melalui device manager. Ini dia langkah-langkahnya :1. Buka Properties Komputer. Kalau di Windows XP, klik kanan My Computer dan pilih Properties. Kalau di Windows 7, klil tombol Start, Pilih Computer, klik kanan dan pilih Properties.2. Selanjutnya, klik tombol Device Manager.3. Klik kanan salah satu device yang drivernya belum teinstall dengan sempurna dan lanjutkan dengan memilih Update Driver. 4. Pada bagian Welcome to the Hardware Update Wizard, pilih Yes this time only dan lanjutkan dengan klik tombol Next.5. Selanjutnya, pilih Install from list or specific location (Advanced) yang diikuti dengan klik tombol Next.6. Pada bagian Please choose your search and installation options, klik tombol Browse dan pilih di mana lokasi di mana sobat menyimpan file driver. 7. Setelah lokasi file driver sudah ketemu, lanjukan dengan klik tombol OK yang diikuti dengan tombol Next. Pastikan sobat sudah memilih folder yang tepat sebelum melanjutkan proses install driver.8. Tunggu sampai proses selesai dan terakhir klik tombol Finish.9. Jika komputer/notebook sobat meminta restart, ikuti saja prosesnya agar keseluruhan proses update bsia berjalan dengan maksimal.
Saya akan membahasCara install DriverPack Solution.ISO :
Terlebih dahulu anda Download DriverPack Solution Final Iso, di situs resminya Disini atau bisa googling di forum lain.
Jika anda sudah berhasil Download, maka anda akan mendapatkan file Driver Pack Solutions dengan format .iso
Silahkan Intstall Daemon Tools Lite. Untuk menjalankan file yg berformat ISO tanpa CD/Cd-Room. (jika belum punya, download dulu DISINI).
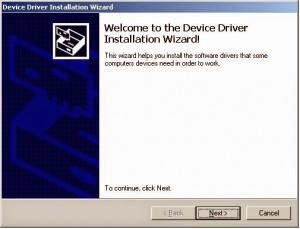
Jalankan Driver Pack Solution Final Iso dan tunggulah hingga muncul kotak dialog seperti ini, Klik Run DrivePackSolution.exe
Tunggulah proses Scan seluruh driver yang perlu diinstall di Laptop/Komputer anda.
Biasanya akan ditunjukkan beberapa driver dan Program yang perlu diinstall dan beberapa driver yang perlu diupdate saja. Langsung saja klik Install and Update
Jika muncul kotak dialog seperti berikut ini, klik saja Start Installation.
Sekarang anda sudah bisa minum kopi sambil menunggu proses installasi driver selesai.
Apabila proses installasi driver selesai, klik saja Restart.
Selamat!! Driver Laptop anda kini sudah berhasil di install.
Cara Install Driver WIFI dan LAN Untuk Semua Merk (All Type):
Silahkan Rekan-rekan Download 3DP driver LAN dan WiFiUniversal secara Gratis Disini —> Download-1 atau Download-2 , Download-3 dan Password-1dan Password-2 Password-3
Untuk mempercepat proses Downloadnya silahkan jika tertarik Software download IDM-nya .
Pada tampilan Software 3DP apabila telah masuk link tersebut, Lalu Anda klik tombol download kemudian pilih salah satu link di sebelah kanan halaman tersebut menurut keinginan Anda dari Opsi yang diberikan. Dan driver akan secara otomatis akan terdownload.
Dalam melakukan Install driver WIFI ataupun LAN, Anda tinggal _doubel _klik pada file driver hasil download tadi, maka file akan melakukan exstract dengan sendirinya namun apabila File tidak dapat melakukan exstract secara automatis berarti file untuk melakukan extract file tidak terinstall pada komputer/laptop Anda maka silahkan terlebih dahulu melakukan install Software Winrar –> Disini maupun Winzip –> Disini atau mirorfile tersebut harus terinstall pada komputer/laptop Anda karena kedua Software inilah yang melakukan proses Extract File yang ber-Extension .Zip dan .Rar sehingga baru dapat diinstall dan Berikut contoh tampilannya dari Software 3dp :
Lalu klik driver untuk menginstall driver LAN Anda. dan bila Anda ingin menginstall driver WiFi, Silahkan klik tanda + maka akan muncul driver WiFi dan kemudian klik driver untuk Install driver WiFi.
Klik next untuk melanjutkan install driver, dan tunggu prosesnya sampai selesai
Apabila Driver telah melakukan install kemudian silahkan di restart maka telah siap untuk digunakan.